Step 3: Record Snaproad
The amount of time this step takes depends on the stage length, but at least you’ll be driving!
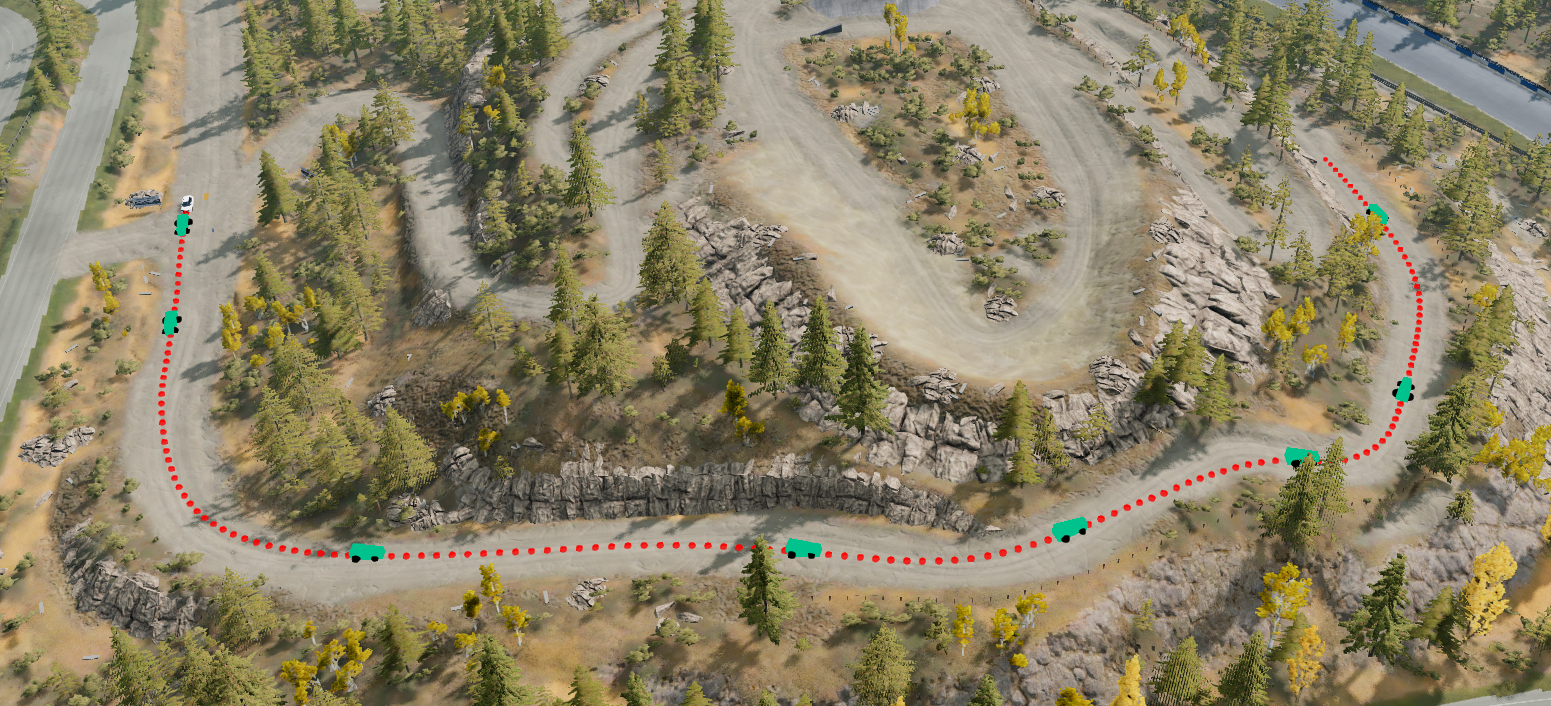
Record the Snaproad (also called the driveline) of the entire stage using the Recce app.
A Snaproad of the entire route is required for making a stage.
Here’s a preview of the end result:
But first, some background…
Recce Cars
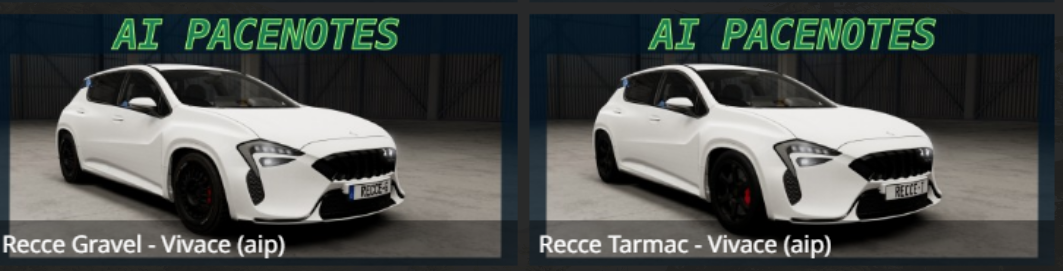
Two Recce Car configs are offered: gravel and tarmac, found under the Cherrier FCV. You’re welcome to use any car for recce, though.
Recce UI Layout
Switch to the [aipacenotes] Recce UI Layout, at the top of the list. If necessary, exit the World Editor by pressing F11.
Hit escape to bring up the main menu:

Click on UI Apps. The UI Apps menu will appear on the left:
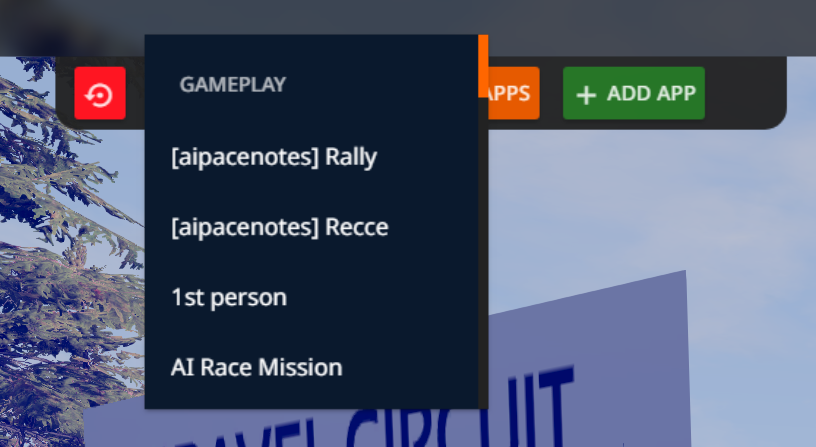
Recce UI Apps
You can see there are three new UI Apps included in the mod.
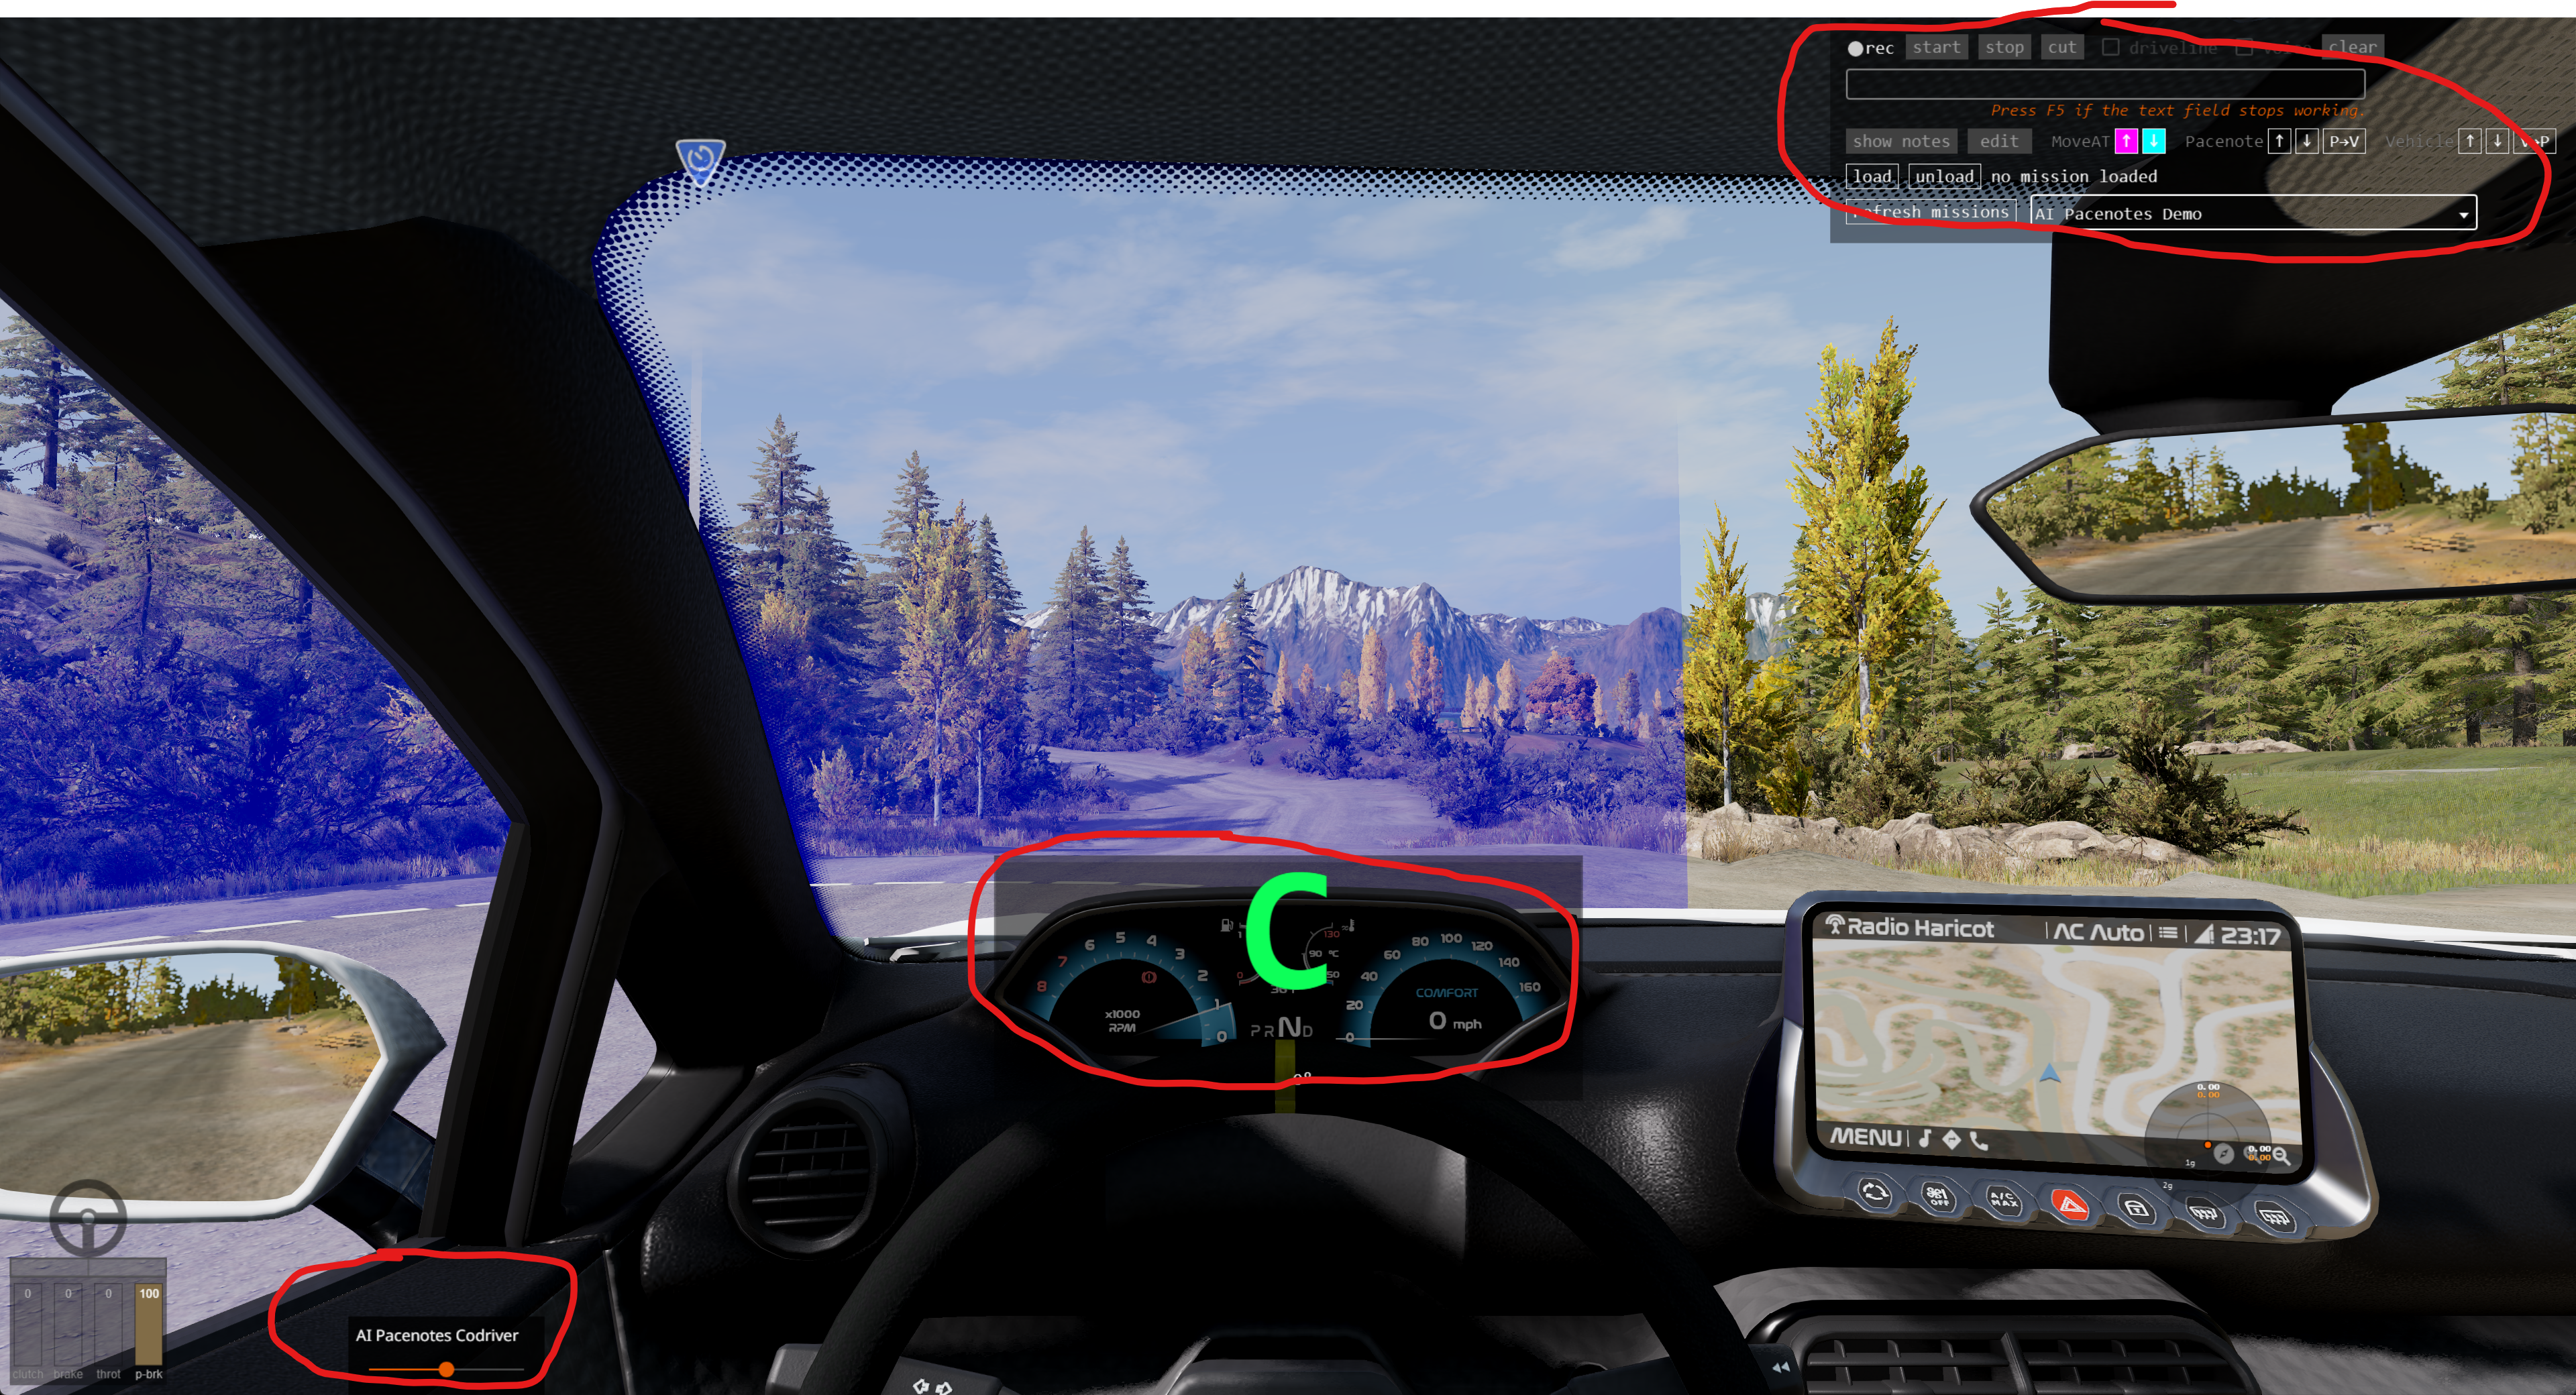
- The bottom left app is called
Codriver - The middle app is called
CornerCalls - The top right app is called
Recce
Codriver controls the volume of the pacenotes, and plays the actual pacenote audio file behind the scenes.
NOTICE: If you don’t hear pacenotes, make sure the Codriver app is in your UI layout!!!
CornerCalls shows the corner call based on the steering wheel angle. This is configurable in the file /settings/aipacenotes/corner_angles.json. You can use this during voice-based recce to improve consistency.
The Recce app has a couple of features:
- controls recording.
- allows you to drive the stage and hear pacenotes without starting the mission.
- edit pacenotes without opening the World Editor.
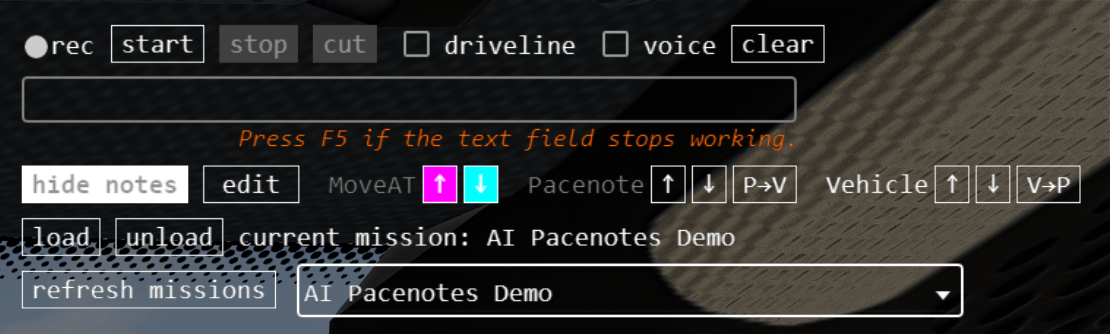
Here’s an overview of the controls for Step 3:
Recording Controls
- driveline checkbox - enables recording a driveline.
- voice checkbox - enables voice recording.
start- starts recording.stop- stops recording.cut- records corner locations. tracks the vehicle’s position & steering wheel angle at the moment the cut happens.- If voice is enabled, also does speech-to-text on the audio recorded since the previous cut. (ie, it “cuts” the recording)
clear- deletes all recording files. If you want to backup a recording, make a copy of this folder:gameplay/missions/<level>/rallyStage/<mission>/aipacenotes/recce/primary/.
Mission Controls
refresh missions- This will reload the dropdown box to the right with all therallyStagemissions available for the current level.load- loads the selected mission into the Recce App.unload- unloads the current mission.
The other controls will be explained after recording is done.
Because recording files are stored in the mission, you must load a mission before recording.
Wheel Binding
In order to place corner locations (referred to as “cuts”) as you drive, you should map the cut keybinding to a wheel button. I like to map it to a button that is easy to press near my thumb.
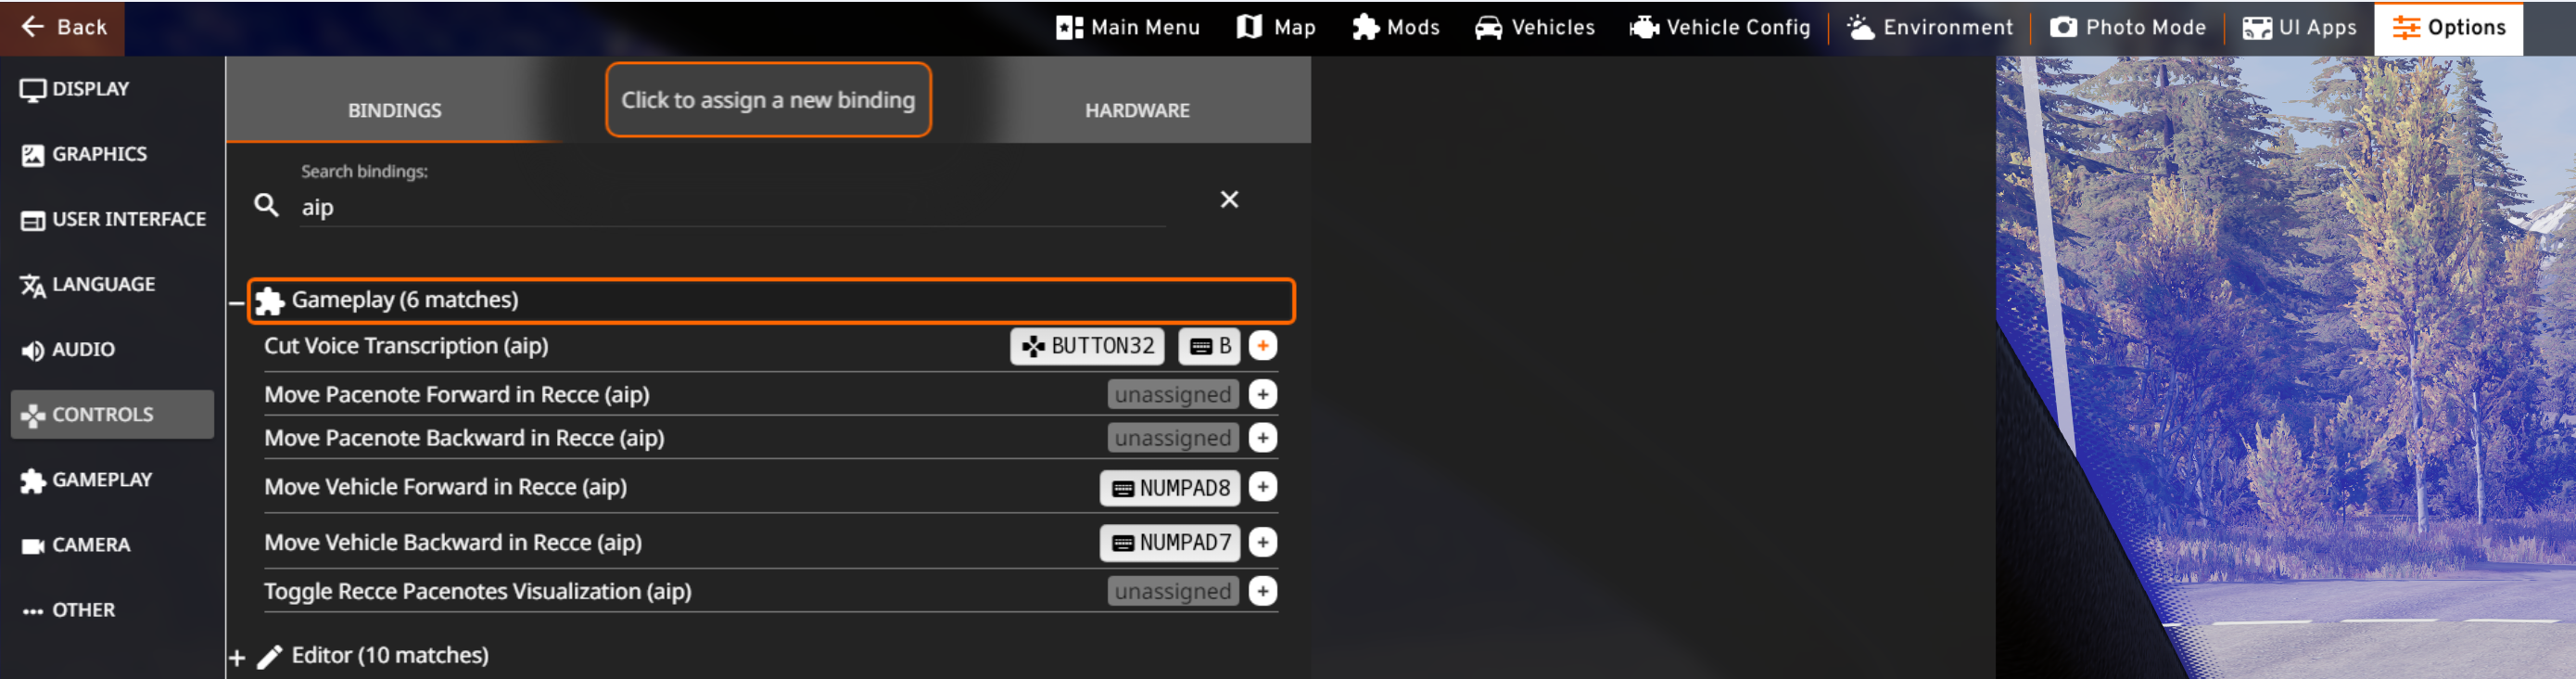
Hit escape to bring up the main menu, then go to Options, then Controls. Search for “aip”, then under Gameplay map the “Cut Voice Transcription” to your button of choice. (note: the name includes the word “voice”, but this action is not specific to voice – needs to be renamed)
You don’t have to do the wheel binding, or even use the Cut button at all. You can just record the driveline.
Recording
With all that background info out of the way, it’s time to record.
Click the driveline checkbox to enable it, and leave voice unchecked. Voice recording will be covered later.
Make sure your vehicle is positioned a bit before the start line. And drive for a while past finish line before hitting stop.
Click start. Drive slowly along the stage, making smooth turns. Don’t try to drive at race speed. (That will come soon!)
As you drive, hit the cut binding to record a corner, or any other feature you want to note. Later, each of these cut locations will be turned into a pacenote.
When you’re done, click stop.
Now you’re done with the recording step!